
If you have cold floors in winter, musty smells you cannot trace, or energy bills that seem higher than they should be, your crawl space might be the culprit. Most homeowners never think about the space beneath their home until something goes wrong, but that out-of-sight area has a direct impact on your comfort, health, and wallet every single day. Crawl space insulation is one of the most effective home improvements you can make, yet it is also one of the most misunderstood.
This guide brings together everything we have learned from years of hands-on work insulating crawl spaces of all types and conditions. Whether you are building a new home, retrofitting an older one, or just trying to understand what your contractor is recommending, this resource covers the full picture. We will walk through what crawl space insulation actually does, the different materials and approaches available, how building codes factor in, the common problems that trip people up, and how to measure whether the job was done right.
Your crawl space is part of your home’s building envelope, whether you treat it that way or not. The building envelope is the boundary between conditioned (heated and cooled) indoor space and the unconditioned outside. When that boundary is weak, you pay for it in three ways: wasted energy, reduced comfort, and increased risk of damage to your home.
The U.S. Department of Energy reports that adding insulation to attics, floors, crawl spaces, and basement rim joists can save homeowners up to 20% on heating and cooling costs, or up to 10% on total energy costs, when combined with proper air sealing. That is a meaningful number, and crawl spaces are a big part of why those savings are possible.
But the benefits go well beyond energy bills. An uninsulated or poorly insulated crawl space creates a path for outside air, moisture, and pollutants to enter your home. According to the EPA’s guide to mold and moisture, indoor relative humidity should be kept below 60%, ideally between 30% and 50%, to prevent mold growth. Unconditioned crawl spaces routinely exceed those levels, and the air from that space circulates into your living areas through floor gaps, plumbing penetrations, and duct leaks.
Beyond energy efficiency and air quality, insulation protects your home’s structural integrity. Moisture that enters through an uninsulated crawl space can cause wood rot in floor joists and framing, damage HVAC ductwork, and create conditions where pests thrive. Properly insulating your crawl space addresses all of these problems at once.
Expert Tip: If your home has hardwood floors that feel cold in winter even when the thermostat reads a comfortable temperature, that is often the first sign of an under-insulated crawl space. Cold air pooling beneath the floor pulls heat directly through the wood, making the surface temperature noticeably cooler than the room air.
Before choosing an insulation approach, you need to understand the two fundamental crawl space designs. The type you have (or choose to create) determines where insulation goes, what materials work best, and how moisture is managed.
Vented crawl spaces are the traditional design found in most older homes. They have foundation vents that allow outside air to circulate through the space, and the floor above the crawl space is insulated rather than the foundation walls. The idea behind venting was that outside air would dry out the space, but building science has shown that this approach often causes more problems than it solves. Understanding the best crawl space insulation can help homeowners choose a more effective approach.
In humid climates, venting actually introduces moisture. During summer, warm outdoor air enters the cool crawl space and condenses on surfaces like floor joists, ductwork, and foundation walls. According to research documented by ENERGY STAR and the DOE’s Building America program, a crawl space kept at 65 degrees with 90% relative humidity will experience condensation when outdoor air at 90 degrees and 60% relative humidity is brought inside. The dew point of the outdoor air (about 74 degrees) is well above the crawl space surface temperatures, so water condenses on every cool surface it touches.
That condensation leads directly to mold growth, wood rot, and degraded insulation. In winter, the vents let cold air in, which undermines floor insulation and makes rooms above uncomfortable. Despite these drawbacks, many building codes still require vented crawl spaces in some form, which is why proper insulation and air sealing are so important when working with this design.
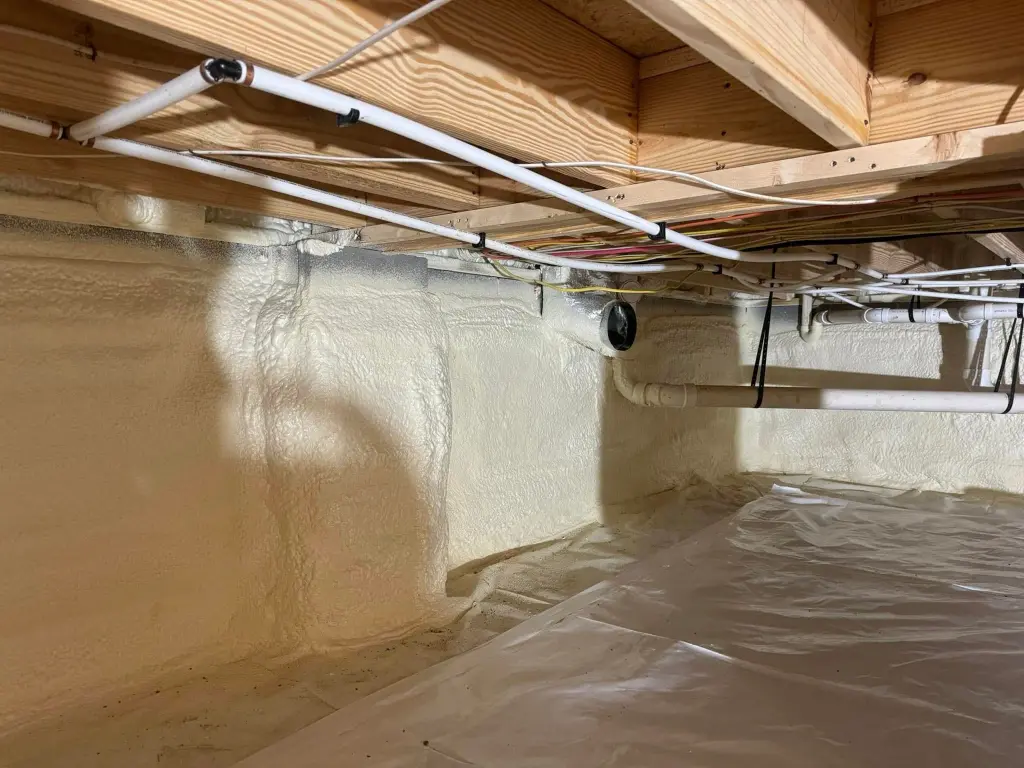
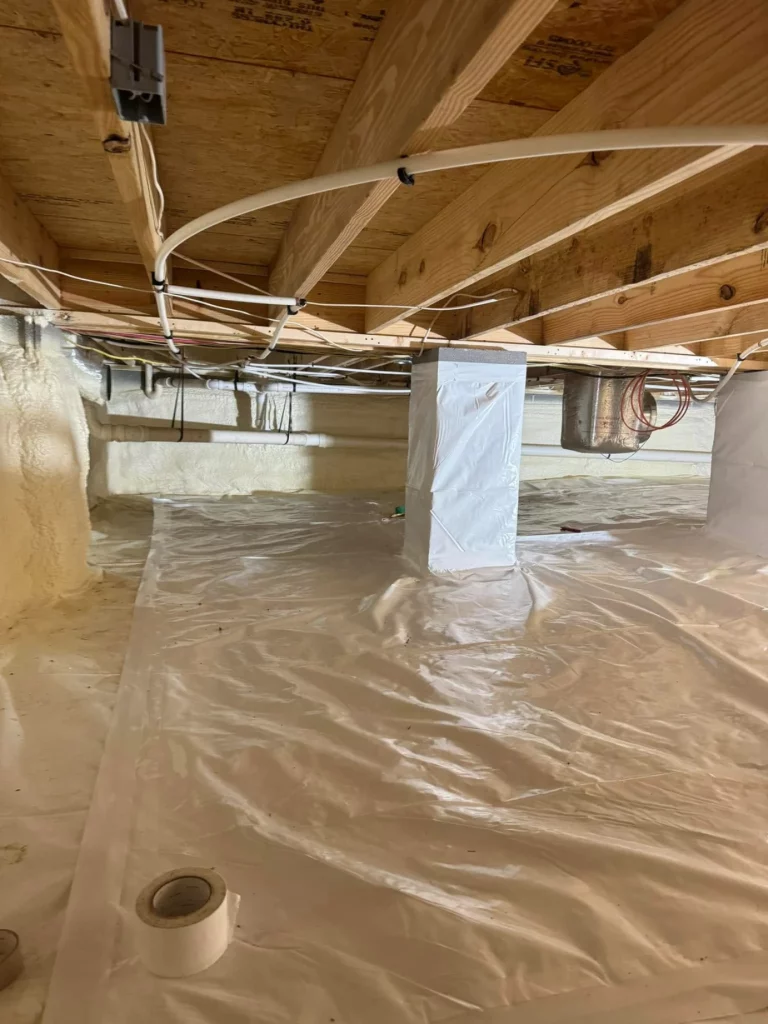
Sealed crawl spaces, also called unvented or conditioned crawl spaces, treat the area beneath the home as part of the conditioned building envelope. Foundation vents are sealed off, a continuous vapor barrier covers the ground and extends up the walls, and insulation is applied to the foundation walls rather than the floor above. The Building America Solution Center’s guide to unvented, insulated crawl spaces describes this approach as one that “can provide an insulated, air-sealed environment for ducts and HVAC equipment, protect floor joists from condensation from humid air in humid climates, and protect floors and pipes from cold temperatures in cold climates.”
The advantages are significant. Ductwork and plumbing stay within the conditioned volume of the house, so they do not need separate insulation or freeze protection. Less insulation is required overall because you are insulating roughly 400 square feet of wall rather than the full floor area of the home above. Air sealing between the house and crawl space becomes less critical because the space is already within the thermal envelope. For these reasons, sealed crawl spaces are now the preferred approach in most climates, especially humid ones.
Key Takeaways: Crawl Space Design
Not all insulation is created equal, and the material you choose matters as much as how much you install. Each type has distinct properties that make it better suited for certain crawl space conditions and applications.
Closed-cell spray polyurethane foam is widely regarded as one of the most effective insulation materials for crawl spaces. It expands to fill gaps and cracks as it is applied, creating a continuous thermal and air barrier in a single step. Closed-cell foam has a high R-value per inch (approximately R-6 to R-7), acts as a vapor retarder with a perm rating below 1.0, and adheres directly to surfaces, making it difficult for pests to dislodge. According to the ENERGY STAR Technology Fact Sheet, proper installation is key to performance.
Because it seals and insulates simultaneously, closed-cell spray foam is particularly well suited for rim joist areas, irregular surfaces, and crawl spaces where air sealing is a priority. Closed-cell spray foam can be used to insulate the floor system above a vented crawl space, providing a “continuous thermal, vapor, and air barrier when connected to the exterior wall control layers.”
Expert Tip: Closed-cell spray foam applied to crawl space walls in a sealed system typically needs to be only 2 to 3 inches thick to meet most climate zone requirements. Going thicker than needed does not provide proportionally better performance and adds unnecessary expense.
Open-cell spray foam is less dense than closed-cell, with a lower R-value per inch (approximately R-3.5 to R-4). It is more permeable to moisture, so it does not serve as a vapor barrier. Open-cell foam is best used in crawl spaces where a separate vapor barrier system is already in place and the priority is filling cavities and sealing air leaks at a lower material cost.
Because open-cell foam can absorb and hold water, we generally do not recommend it for direct application on crawl space walls or below-grade surfaces. It can work well in band joist cavities and floor assemblies above a properly sealed and drained crawl space.
Fiberglass batt insulation is the most traditional and widely available option. It comes in pre-cut widths designed to fit between standard floor joist spacing (typically 16 or 24 inches on center) and in rolls for longer runs. Fiberglass has an R-value of about R-3.2 per inch, so R-19 batts are roughly 6 inches thick and R-30 batts are about 9.5 inches thick.
Fiberglass works reasonably well in vented crawl spaces when installed against the subfloor with proper support from wire hangers or friction fit. However, it has significant weaknesses in crawl space environments. It absorbs and holds moisture, which drastically reduces its effective R-value and encourages mold growth. Gravity, rodents, and general degradation over time can cause fiberglass batts to sag or fall out entirely, leaving gaps in coverage. In our experience, fiberglass in crawl spaces often needs replacement after 10 to 15 years, while spray foam and rigid foam can last the life of the home.
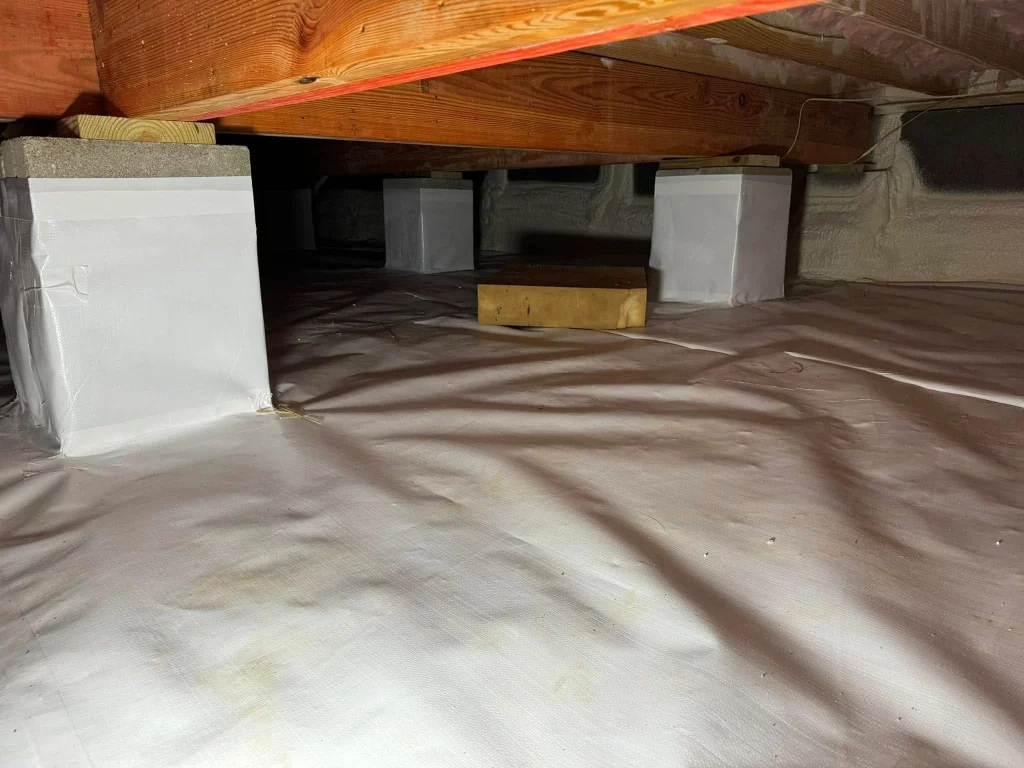
Rigid foam board insulation comes in three main types: expanded polystyrene (EPS), extruded polystyrene (XPS), and polyisocyanurate (polyiso). Polyisocyanurate (polyiso) and XPS are recommended for crawl space wall applications because of their low permeance to water and high R-value per inch.
| Foam Type | R-Value per Inch | Water Permeance | Best Use |
|---|---|---|---|
| EPS | 3.8 to 4.4 | Relatively high (semi-permeable) | Above-grade walls, exterior applications |
| XPS | 5.0 | Low | Below-grade walls, crawl space interiors |
| Polyisocyanurate | 5.6 to 6.5 | Very low | Interior crawl space walls (faced or unfaced) |
Rigid foam is mechanically fastened to crawl space walls using masonry fasteners with large cap washers. Seams are sealed with spray foam or tape to create a continuous barrier. For the band joist area, rigid foam can be cut to fit individual cavities and sealed in place with expanding foam.
Expert Tip: When using rigid foam on crawl space walls, choose unfaced boards or remove the facing material. The facing can trap moisture against the foundation wall in some conditions. At the band joist area, a small amount of breathability is actually beneficial for wood drying.
Cellulose is made from recycled paper treated with fire retardants and borates for pest resistance. It has an R-value of about R-3.5 per inch and is typically blown into cavities as a loose-fill material. While cellulose performs well in wall cavities and attics, it is not a good choice for crawl spaces because it is highly susceptible to moisture damage. When cellulose gets wet, it compacts, loses its R-value, and can support mold growth. We rarely recommend cellulose for crawl space applications except in specific above-floor scenarios with excellent moisture barriers.
| Material | R-Value/Inch | Air Barrier | Vapor Barrier | Moisture Tolerance | Lifespan in Crawl Space |
|---|---|---|---|---|---|
| Closed-cell spray foam | 6.0 to 7.0 | Yes | Yes (Class II) | Excellent | 50+ years |
| Open-cell spray foam | 3.5 to 4.0 | Yes | No | Poor | 20+ years |
| Fiberglass batt | 3.2 | No | No | Poor | 10 to 15 years |
| Rigid foam board | 3.8 to 6.5 | With sealing | Varies by type | Good | 50+ years |
| Cellulose | 3.5 | No | No | Poor | Not recommended |
These two terms get used a lot interchangeably, but they describe different (though complementary) things. Understanding the distinction is important because you may need both for a truly effective result.
Insulation is a thermal barrier. It slows the transfer of heat between two spaces, keeping your heated or cooled air inside your home rather than escaping through the floor or foundation walls. Without insulation, your HVAC system works harder to maintain comfortable temperatures, especially in extreme weather.
Encapsulation is a moisture control system. It involves sealing the crawl space with a heavy-duty vapor barrier (typically 20-mil polyethylene, much thicker than the 6-mil sheeting used for basic moisture control), sealing all foundation vents, sealing rim joists and penetrations, and often adding a dehumidifier. Encapsulation creates a dry, conditioned environment by controlling moisture at every entry point.
You can insulate without encapsulating, and you can encapsulate without adding insulation to the walls (though you would still want insulation somewhere in the assembly). For the best results, though, insulation and encapsulation work together. Encapsulation handles the moisture, and insulation handles the temperature. In a sealed crawl space, you need the vapor barrier to keep ground moisture out and the wall insulation to maintain thermal performance.
Key Takeaways: Insulation and Encapsulation
R-value measures how effectively insulation resists heat flow. Higher R-values mean better insulation performance. The International Energy Conservation Code (IECC) sets minimum R-value requirements that vary by climate zone, and these requirements have been updated across successive code cycles. Crawl space wall and floor insulation requirements change significantly depending on where you live.
The IECC divides the United States into eight climate zones (with sub-zones for moisture), numbered from warmest (Zone 1) to coldest (Zones 7 and 8). Here are the crawl space-specific insulation requirements under the 2021 IECC:
| Climate Zone | Floor over Vented Crawl Space (R-Value) | Crawl Space Wall (R-Value) |
|---|---|---|
| 1 | R-13 | None required |
| 2 | R-13 | None required |
| 3 | R-19 | 5ci or R-13 |
| 4 (non-marine) | R-19 | 10ci or R-13 |
| 4 (marine) | R-30 | 10ci or R-13 |
| 5 | R-30 | 15ci or R-19 or R-13+5ci |
| 6 | R-30 | 15ci or R-19 or R-13+5ci |
| 7 and 8 | R-38 | 15ci or R-19 or R-13+5ci |
Note that “ci” stands for continuous insulation, which means rigid foam or spray foam applied in a continuous layer on the interior or exterior of the wall. For crawl space walls, continuous insulation is typically the practical choice because it is applied directly to the concrete or masonry surface.
Expert Tip: Meeting code minimums is the floor, not the ceiling. In many cases, going one step above code minimum insulation levels pays for itself through energy savings over the life of the home. We always evaluate your specific conditions and recommend levels that balance upfront investment with long-term performance.
Whether you are working with an existing vented crawl space or creating a sealed system, the process follows a logical sequence. Skipping steps, especially moisture control and air sealing, undermines everything that follows.
Before any insulation goes in, you need a clear picture of what you are working with. Walk through the crawl space (or have a professional do it) and check for standing water, active leaks, mold growth, damaged wood, pest activity, and existing insulation condition. Take moisture readings and note the overall condition of the vapor barrier if one exists.
Common issues to document include:
Insulation installed over a moisture problem will fail. Period. A “water-managed foundation system” is the first requirement for any effective crawl space.
Air sealing is one of the most overlooked steps in crawl space insulation, and it has an outsized impact on performance. Gaps and cracks in the building envelope allow conditioned air to escape and unconditioned air, moisture, and pollutants to enter. Key areas to seal include:
Use caulk for gaps up to a quarter inch and spray foam for larger openings. This step alone can have a noticeable impact on comfort before any insulation is even installed.
The installation method depends on whether you are working with a vented or sealed crawl space system.
For vented crawl spaces, insulation goes against the subfloor above. If using fiberglass batts, they should be cut to fit snugly between joists, flush against the subfloor, and supported with wire hangers or friction fit. For truss floor systems, netting or rigid foam can be installed on the underside of the trusses, with the cavity filled with loose-fill insulation. Alternatively, closed-cell spray foam can be applied directly to the subfloor and rim joist area.
For sealed crawl spaces, insulation goes on the foundation walls. Rigid foam board is mechanically fastened to the walls and seams are sealed. Existing vents are filled with cut pieces of rigid foam and sealed with spray foam. The band joist area can be insulated with rigid foam cut to fit each cavity. Spray foam can also be applied directly to walls for a monolithic seal.
Expert Tip: When insulating the floor above a vented crawl space, run plumbing supply lines together in a few joist bays and split the insulation batts around them. This keeps pipes within the insulated envelope without creating large voids in the insulation coverage. Never leave plumbing outside the insulation in a vented crawl space in a cold climate.
Any ductwork and plumbing in the crawl space that is outside the conditioned envelope needs insulation. For sealed crawl spaces, this is less of a concern since the space is conditioned. For vented crawl spaces, duct insulation is critical because leaky, uninsulated ducts in a vented crawl space can lose 15% to 25% of the conditioned air they carry before it ever reaches your living space. Insulate hot and cold water lines to prevent heat loss and freezing.
The crawl space access door or hatch is often the weakest link in the insulation system. An uninsulated, unsealed hatch can account for a surprising amount of energy loss. Insulate the access panel with rigid foam glued to the interior, caulk the framing, install weatherstripping around the inside of the frame, and use a latch that pulls the door firmly against the seal.
After installation, verify that insulation coverage is complete and continuous with no gaps, voids, or compression. Check that the vapor barrier is intact and all seams are sealed. If you have converted from a vented to a sealed crawl space, verify that a drying mechanism is in place, whether that is conditioned air supply from the HVAC system, a small exhaust fan, or a dehumidifier. Monitor humidity levels in the crawl space over the following weeks to ensure they stay within the 30% to 50% range recommended by the EPA.
Crawl spaces present a unique set of challenges that do not typically appear in attics or wall cavities. Understanding these issues ahead of time helps you plan properly and avoid costly mistakes.
Moisture is the single biggest enemy of any crawl space insulation system. Mold can begin growing within 24 to 48 hours of a moisture event, and the key to mold control is moisture control. In crawl spaces, moisture comes from multiple sources: groundwater wicking through the foundation, humid outside air entering through vents, plumbing leaks, and condensation.
Any existing mold must be remediated before new insulation is installed. Mold on surfaces covering less than about 10 square feet can often be cleaned by a homeowner following EPA guidance, but larger areas require professional remediation. More importantly, the moisture source that allowed mold to grow must be identified and fixed, or the mold will return regardless of what insulation you install.
Expert Tip: If you can smell a musty odor in your home but cannot see visible mold, check the crawl space. The stack effect (the natural upward movement of air in a building) pulls air from the crawl space through floor penetrations and into living areas, carrying mold spores and musty odors with it. Sealing and insulating the crawl space can eliminate this air pathway.
Crawl spaces are attractive to rodents, insects, and other pests because they offer shelter, moisture, and food sources. Insulation materials, especially fiberglass batts, can become nesting material for mice and rats. Foam insulation is less susceptible to pest damage, but no insulation material is truly pest-proof.
It is recommended to leave a pest control inspection strip of at least 3 inches of bare foundation wall above the insulation and below the rim joist in areas prone to termite or carpenter ant infestation. This gap allows pest control professionals to visually inspect for termite tunnels. The gap should be painted white to make tunnel activity easier to spot.
For burrowing rodents, foundation walls should extend at least 36 inches below grade, or a curtain wall of concrete or metal should be installed to discourage tunneling.
Radon is a naturally occurring radioactive gas that can enter homes through the foundation and floor system. It is the second leading cause of lung cancer in the United States. It is recommended to install a radon-resistant construction system that includes a sealed layer of polyethylene over the crawlspace floor, a perforated tee fitting below the polyethylene, a vertical vent pipe extending through the roof, and an electrical junction box in the attic for a future radon fan.
If your home already has a radon mitigation system, sealing and insulating the crawl space can affect how it operates. In some cases, converting to a sealed crawl space may require modifications to the radon system to maintain proper ventilation. We always recommend testing for radon before and after crawl space encapsulation.
Crawl spaces in flood-prone areas require special consideration. It is recommended to use a vented, unconditioned crawl space design rather than a sealed design in flood hazard areas. This is because sealed crawl spaces are difficult to clean and dry after flooding, while vented crawl spaces can be designed to allow floodwater to enter and exit without creating hydrostatic pressure differences.
Flood vents must be installed to equalize water pressure on foundation walls during a flood event. The IRC requires at least 1 square inch of opening for every square foot of crawlspace area, distributed across at least two walls. In flood-prone crawl spaces, insulation should use materials that can withstand water exposure, and assemblies should be designed for easy removal and replacement if flooded.
Guide to Flood-Resistant Crawl Space Construction
How do you know if your crawl space insulation is doing its job? There are several measurable indicators you can track.
According to the U.S. Department of Energy’s Guide to Home Insulation, proper insulation combined with air sealing can reduce heating and cooling costs by up to 20%. After insulating your crawl space, compare your energy bills against the same period from the previous year, adjusting for weather differences. Look for trends over several months rather than a single bill, since many factors affect energy use.
Comfort improvements are often more immediately noticeable than energy savings. Pay attention to cold spots on floors, temperature consistency between rooms, and whether your HVAC system runs shorter cycles. These are real, tangible benefits that affect your daily quality of life.
Monitor crawl space humidity with a hygrometer. After insulation and encapsulation, humidity should stabilize in the 30% to 50% range. If levels consistently exceed 60%, you may need additional dehumidification, or there may be an unresolved moisture source.
Many homeowners report reduced allergy symptoms, fewer musty odors, and generally fresher indoor air after properly insulating and sealing their crawl space. This is a direct result of eliminating the pathway for crawl space air (and everything in it) to enter the living space.
For the most accurate measurement of improvement, consider scheduling a home energy audit before and after the insulation project. A professional energy auditor can use tools like a blower door test and thermal imaging to quantify air leakage reduction and identify any remaining gaps in the building envelope.
Crawl space insulation is not the most exciting home improvement project, but few projects deliver such a wide range of benefits across comfort, health, energy efficiency, and durability. Whether your home has a vented crawl space that needs upgraded floor insulation or you are ready to convert to a modern sealed system, the fundamentals are the same: control moisture first, air seal thoroughly, then insulate with the right material at the right R-value for your climate.
Here is a quick checklist to move forward:
Use this guide as your reference as you plan and execute your project. The right insulation approach, done correctly, will pay dividends for as long as you own your home.
If you are ready to improve your home’s comfort, energy efficiency, and durability through professional crawl space insulation, we are here to help. Spray Foam Pro has the experience and expertise to assess your crawl space, recommend the right approach, and deliver quality results. Reach out to us at [email protected] or call (910) 606-6247 to schedule a consultation. We will walk through your specific situation and help you make the best decision for your home.
It depends on whether your crawl space is vented or sealed. In a vented crawl space, insulation goes on the floor above. In a sealed crawl space, insulation goes on the foundation walls. The wall approach is generally preferred because it protects ductwork and plumbing, requires less total insulation, and reduces condensation risk.
Costs depend on your crawl space size, the insulation material chosen, whether encapsulation is included, and your geographic area. We provide specific pricing during an on-site assessment since every crawl space has unique conditions that affect the scope of work.
Some aspects, like laying a vapor barrier or installing fiberglass batts in a vented crawl space, can be done by experienced DIYers. Spray foam application, however, requires professional equipment, training, and safety precautions. We recommend professional installation for sealed crawl space systems because the air sealing, insulation, and moisture control all need to work together as an integrated system.
Spray foam and rigid foam insulation can last 50 years or more when properly installed. Fiberglass batts in crawl spaces typically last 10 to 15 years before degradation from moisture, gravity, and pests requires replacement.
Not always, but it depends on your climate and conditions. The building code requires a drying mechanism for sealed crawl spaces, which can be conditioned air from your HVAC system, a small exhaust fan, or a dedicated dehumidifier. In humid climates, a dehumidifier is often the most reliable way to maintain humidity below 60%.
Properly installed insulation will not cause moisture problems. In fact, it helps prevent them. When done incorrectly (for example, installing fiberglass in a damp space without addressing the moisture source), insulation can trap moisture and make existing problems worse. That is why moisture control and air sealing must come before insulation.
Yes. When installed by trained professionals following manufacturer guidelines, spray foam insulation is safe for crawl space applications. Closed-cell spray foam also acts as a vapor retarder, which provides additional moisture protection. The material cures quickly and, once cured, is inert and non-toxic.